Tampilkan postingan dengan label eyeshadow. Tampilkan semua postingan

Senin, 21 April 2014

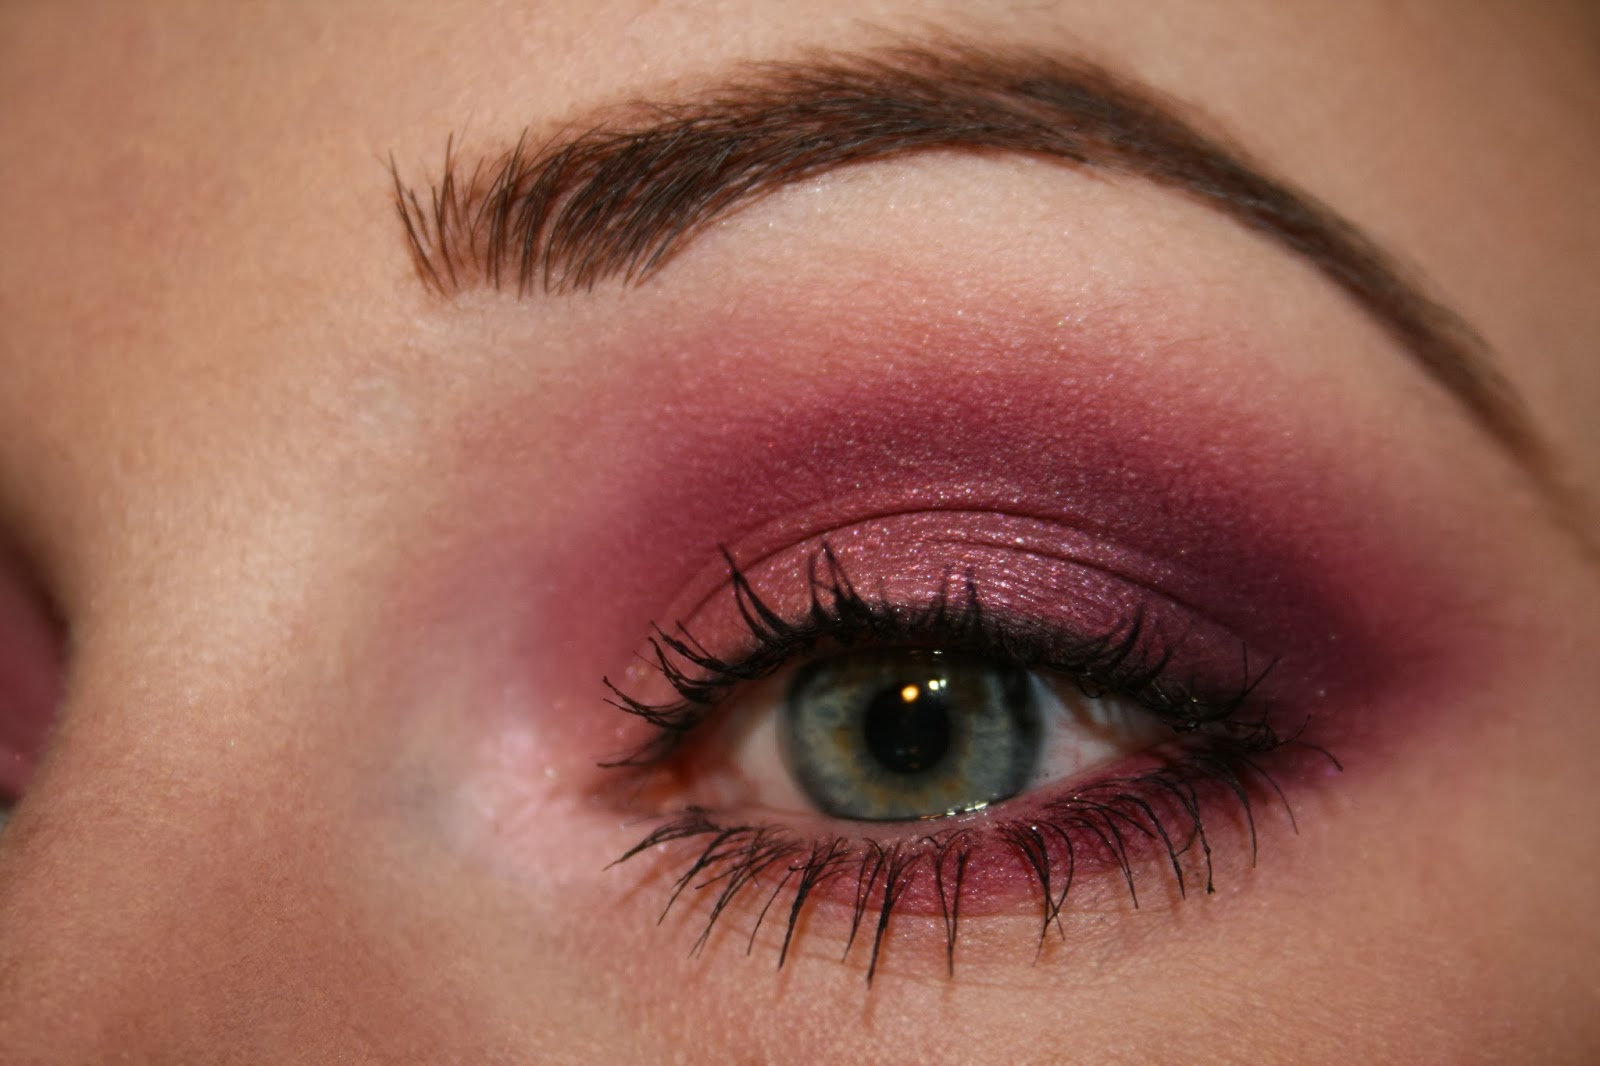
Urban Decay Electric Palette Look #2!

Hey guys,
I am having so much fun with the Urban Decay Electric Palette! I can't get over how pigmented and flawless the pigments are.
I know I've only just put a look out but it took me soo long to do I didn't want to wait around any longer for another!
I am so tempted to wear this look out tomorrow! It's crazy bright but it looks amazing - I can't believe how well the colours blend together!
In this look I have used Slowburn, Savage, Jilted, Urban and Chaos. So half the colours in the palette!
I started with ELF cosmetics primer and NYX jumbo eye pencil in Milk as my base and Slowburn on my entire eyelid.
Next I applied Savage into my crease and blended out with Mac's Blanc Type, then darkened my crease using Jilted.
For a finishing touch I applied Aura from UD's Glinda Palette.
To my lashline I applied Chaos very closely to my lashes, to later darken Urban which went over the top, and blended out with blanc type - to create a type of gradient effect.
On my waterline is Rockstar 24/7 pencil from Urban Decay, and to create my wing I applied Perversion liquid liner.
...I think I'm a bit of an Urban Decay Junkie!
Lashes are the Princess Lashes from Born Pretty Store and Urban Decay Supercurl Curling Mascara.
So that's today's look, I hope you like it as much as I do! This is definitely a favourite of mine from recent months looks :)
x

Minggu, 20 April 2014

Urban Decay Electric Palette Look!

Hey guys!
I'm sorry I've been gone for a while, I've had a lot of hours at work lately and it's completely tired me out! I've had this look in my back pocket for a while and I absolutely love it! I needed to put it up asap - I'm just annoyed asap took so long!
Anyway here's the look, a bit picture heavy! I hope you like it :)
As always I started with my Elf primer and NYX jumbo eye pencil in Milk as my base.
To start my look, I applied Thrash over the inner two thirds of my eyelid. I cannot believe how pigmented this shadow was! I was expecting Thrash, Savage and Slowburn to be maybe a bit clear but the colour payoff is insane!
In the outer third and in my crease I applied gonzo which came out a stunning sky blue over NYX JEP in Milk, and sea blue over Thrash. In the very outer crease I use Fringe and a little Chaos.
On my brow bone I blended in Mac's Blanc Type with Gonzo to create a smoother finish and worked both shades of Aura from Urban Decay's The Great and Powerful Oz, Glinda Palette into my inner corner for a little bit of shimmer.
My eyeliner is Urban Decay's Perversion Liquid Liner and Lashes are the Princess Lashes from Born Pretty Store.
Under my lower lashes I applied Slowburn which is a gorgeous, bright shimmery orange shade.
On my waterline is Eyeko Skinner Kohl Liner in a light pink shade which I am loving at the moment. I do love using black eyeliner but it can make your eyes look so much smaller sometimes. The payoff in Eyeko's liners are fantastic and definitely worth the price.
Mascara is Urban Decay's Supercurl Curling Mascara and that's the look done!
I hope you like this look guys, fingers crossed I will have something new for you soon!
x

Kamis, 13 Maret 2014

Inglot Eyeshadow Look

Hello guys! Sorry I've been gone so long! I've recently got a new job so I haven't had as much free time as I did before. I've got a few days off now though so hoping to get some more posts ready!
Every since I got my new Inglot shades, I've wanted to play around with them - finally I got the chance! I hope you like my look!
Inglot shade 369, the light blue, was so pigmented and easy to blend, a great surprise from such a pastel colour. Not at all chalky and pay off was fantastic, I will definitely be visiting Inglot sometime soon for some similar colours!
I've blended it with Highness and Villan in the very outer corner, from Sleek V2 Palette, and the pink is a shade from my P88 Palette from Born Pretty. Eyeliner is Control from Lush and currently my favourite liner! Such a beautiful colour and an easy way to add a pop of colour to your look when rushing your makeup!
In my inner corner I've added Inglot shade 24, which I am also loving. It has such a gorgeous shimmer which lasts all day. Under my eye I carried on shade 24 until the middle of my eye and blended it out into my outer corner using Ink from Sleek V2 Palette.
 
I didn't get as far as applying eyelashes until I RUINED this look with mascara all over my top lid -_- there was no coming back from the mistake I made...but it's still a lovely look, which I wore to work the next day!
I hope you like it, let me know what you think!
I'm thinking a new Sleek Palette Look next maybe? We'll see...
x

Selasa, 25 Februari 2014

Inglot Eye Shadow Review, Shades 369 & 24

Hey Guys!
I am one of the lucky few in the UK who has an Inglot store 10 minutes away from where I live, and I plan on making the most of it!
I was out shopping for new jeans the other day and mistakenly stumbled into Inglot, what a shame. My lovely boyfriend treated me to 2 new shadows and I think I definitely picked 2 of the best! But I'll let you be the judge of that...
So these are my latest additions...Left is shade 369 and on the right shade 24.
For the quality of the products, I still can't get over the price. It's so cheap!
As a comparison - 1 Inglot eye shadow pan which is 2.3g/0.08 US OZ is £4.50
1 Mac eye shadow pan which is 1.5g/0.05 US OZ is £10!
So not only is the quality equally as good if not better, you get more product than Mac and its less than half the price!
This lovely looking pan is Shade 369.
It's so hard to describe this colour, it instantly caught my eye.
I guess it's in between pale blue and a pastel purple, reminds me of bluebells!
It has a matte finish and being such a pastel shade it's a bit chalky but no where near as bad as what I was expecting, not like Sleek Makeup's pastels! Great Pigmentation.
And my other purchase, Shade 24.
Inglot describe it as an AMC Shine, which to me seems like the Veluxe Pearl Finish by Mac.
It's an aqua shade with a gorgeous frost finish.
The tester in store looked completely different though, it looked more like a matte white with an aqua shimmer/frost...I actually went back to check I was given the right one! (No offence to the lovely ladies working there, but when I went to Inglot in Westfield's I was given ALL the wrong shades, so glad I checked them whilst I was still there!)
I bought this because I thought it would look great as an inner corner highlight so I'm now waiting to try it out. It swatches the same as the one in store, maybe an improved formula?
Swatch time! This photo is taken with flash and under a natural sunlight bulb.
Left swatches are over NYX jumbo eye pencil in Milk, Right is without a base.
This is the same, without flash, under the natural sunlight bulb.
The frost in shade 24 stands out so much better without the sticky base, will definitely just be using my primer with this one!
 
So that's that, now I've photographed and swatched them I can't wait to play around and see what looks I can come up with! I was so close to buying a gorgeous canary yellow instead of shade 369, I'm glad I spotted it last minute, and at least I know what my next purchase will be!
 
x

Sabtu, 22 Februari 2014

Glitter Me Pink Eyeshadow Look!

Hey guys, I've got another makeup look for you today, I hope that's alright!
This started out as something completely different to what it actually is. I was trying to do a look based around an Inglot shade but it just wasn't sparkly enough for me.
Obviously when something isn't sparkly enough what do you do? Add glitter! I hope you like it.

To begin this look I used ELF primer and NYX Jumbo Eye Pencil in Milk as my base.
When using bright colours I always use my NYX JEP in Milk as it makes the colours more vibrant.
I started by adding Meteoric (Sleek Celestial Palette) all over my eyelid, and Maple (Sleek Ultra Matts V2) to define my crease.
As my 'main' colour I added shade 613 from Inglot over the inner 2 thirds of my eyelid - where the glitter is now.
To darken the outer third of my crease I used Flora (Sleek Garden of Eden Palette).
To highlight my brow bone, and blend out the crease colours I used Blanc Type by Mac, and applied Pink Jewell (Sleek Lagoon Palette) to the corner of my eye to highlight.
Next I applied Eyeliner, which was Urban Decay 24/7 Liquid Liner in Perversion.
This is when I realised I wasn't completely happy with the look, and decided to add glitter! I've never been able to get on with glitters before so I was chuffed when it worked! I've never been able to find a product that's worked for me and the glitter, to get it to stick to my eye and not crease or dry out and fall off!
FINALLY I have found a product (actually my sister bought it for me for my birthday!) So, I used Bellapierre Clear Eyeliner Base to apply my MAC glitter in Pink.
Onto the few final steps... I added my Max Factor Excess Volume Mascara and Eylure Lashes in #100. I touched up my Perversion eyeliner and added Stila Smudge Stick in Stingray to my waterline and voila! My look is complete :)
So that's today's look, I hope you like it! Now I've found a glitter base I can work with I can't wait to see what looks I can do! Prepare for more glitter...
x

Jumat, 21 Februari 2014

Lush Intuitive Makeup Look! Aka...The Tizzy Look!

Hey guys,
My wonderful best friend, Tizzy bought me one of Lush's cream eyeshadows as part of my birthday present (she knows me too well) so I thought seeming as I am missing her so much I'd do a look just for her! I moved last month to Cambridge from the Isle of Wight and I don't know how I've coped so long without her D:
I hope you like my look!
Lush Intuitive is a golden lime-green, shimmery cream eyeshadow which dries within a few seconds making it perfect for layering, but if you're quick enough it works as a great eyeshadow base too.
I absolutely adore the little bottles the emotional brilliance products come in! They look so cute lined up on my makeup table.
At first glance this colour might not seem to be everyone's taste but it's definitely worth a swatch. If you layer this colour up you get a beautiful vibrant green with golden shimmer, however if you want something more subtle then just use a little and you get a wash of gold shimmer with a slight green tone which would look beautiful with hazel eyes.
I used ELF primer as my base, and added Intuitive over my eyelid a couple of times to build up a good solid colour. To set the colour I used Fig from Sleek's Garden of Eden Palette as it's a pretty good match!
From Sleek's Ultra Matts V1 palette I used Cricket and Dragonfly to darken the crease and Pow! on my brow bone. To blend out the crease I used Adam's Apple from Garden of Eden, and Fern from Ultra Matts V2 in the outer corner of my eye to create a darker shadow effect.
To highlight my inner corner, I added Oyster from Sleek's Lagoon palette (love this shade!) and to line my lower lash line I applied Intuitive, and Fern.
My winged eyeliner is Urban Decay 24/7 Liquid Eyeliner in Perversion and Stila Smudge Stick in Stingray to line my waterline. Both are my go to liners, I'd be lost without them!
Eyelashes are my favourite Eylure #100 and mascara is Max Factor Excess Volume.
So that's my look! I hope you like it :)
x

Selasa, 04 Februari 2014

Sleek Garden of Eden Palette Look!

Hey Guys,
Sorry I've not posted in forever! So much going on in January, it was my birthday, then I went to the Isle of Wight to see my family, and since being back in Cambridge I've been job hunting which has got to be one of the most depressing things I've ever done! I'm applying for jobs I really don't want because I haven't heard back from the one I do want... I'm not good at this patience thing!
Anyway!
Just a quick post today to show you guys a look I create with the new Garden of Eden Palette from Sleek!
I've always loved their palettes and use them on a daily basis, so when a new one comes out you can bet I'm the first one in line to get it. So, here's my look...
I was struggling with my lighting at this stage so I've only got two photos, sorry! I now have new lighting and everything is back to normal, wohoo! I hate it when you do a look you like, but you can't capture it!
I found it hard to create a look using just this palette, I think my inspiration wondered off for a while but I'm hoping it's back now! I really want to get out some more looks!
 
Eyeshadows I used were:
Flora - in the crease and lower waterline
Forbidden - Blending out Flora
Gates of Eden - Eyelid
Entwined - over crease
Tree of Life - Eyeliner and under eye
Fauna + Fig - lower lash line
Eve's Kiss - inner corner
 
Primer
E.L.F eye primer
NYX Jumbo Eye Pencil in Milk
 
Mascara
MAC's Plush Lash
Benefit's Their Real
 
Eyelashes
Eylure #100
 
I hope you like my looks, I promise there's more to come!
x

Selasa, 14 Januari 2014

Sleek Snapshots Palette Look!

Hello everyone!
I was going to leave this look for a few more days, but I love it too much so I thought I'd post it now!
I recently got 4 more Sleek palettes, some I was lucky enough to get for Christmas, and I want to do a look using every one! Or maybe two or three...
So here's the first look, using the Snapshots Palette!
http://enchantedmakeup.blogspot.co.uk/2014/01/sleek-snapshots-palette-look.html
The colours in this palette are incredible to work with. Some swatch a little different to how they look in the pan, which I kind of like, makes a nice surprise! Humming Bird has an amazing golden shimmer which you can't tell until applied.
This is what the pretty palette looks like! The colours are: TOP (L-R) Summer Breeze, Sand Dollar, Kiwi Flower, Lotus Flower, Humming Bird, Tequila Sunrise
BOTTOM (L-R) Sand Walker, Washed Ashore, Sunset, Green Iguana, Purple Haze, Magenta Madness.
I started with ELF primer, and NYX jumbo pencil in milk as my base. I then used Sand Walker on a small, flat angled brush to line where I wanted my crease.
Next, I patted on Summer Breeze using a small C brush onto my entire lid.
Using Purple Haze I went over Sand Walker to define my crease and blended slightly.
Using a small fluffy pencil brush I blended Magenta Madness into the Purple Haze and upwards. Using a pencil brush, I went over the crease with Purple Haze again and blended into the outer half of my lid. To create a smoother transition I finished my lid with Green Iguana.
In my inner corner I applied Sand Dollar (which I love!) and used Purple Haze and Sand Dollar under my lash line. I applied Purple Haze with a flat brush on my waterline.
Eyelashes are #100 from Eylure and my mascara as always is MAC Plush Lash and Benefit They're Real. They were beautifully together!
So that's my look! I hope you like it as much as I do! I can't wait to do another look with this palette, but first, a look with all the others!
I hope you like it! And thank you for all your lovely comments! It always brightens my day reading them :)
x

Minggu, 12 Januari 2014

NYE Makeup! Sleek Vintage Romance Palette Look!

Hey guys! I'm in the middle of moving still at the moment so I haven't been able to do any recent looks so I've had to hold some back! This was my makeup look for NYE! I hope you all had a lovely night, and I hope you like my look!
I've been on the hunt for Sleek's Vintage Romance Palette for a while and I found it in a piercing studio on the Isle of Wight! I was so happy! I picked it up and instantly had to do a look with it!
I'm addicted to pinks and burnt orange shades at the moment, they're so fun to play around with!
The Vintage Romance palette includes a matte shadow and shimmer/glitter shades so you can create some gorgeous looks. You will also need a hightlighter shade though!
In this palette, for this look I used the top right shade, all three gorgeous pinks and the glittery black for my eyeliner. Sometimes, I think a thick black line can ruin a look so I like to just press a black shadow into my lashline.
I wore this look out on NYE and even my 8 year old niece said she likes it! Which was a shock seeming she's a complete tomboy, and being 8 she usually just says 'what's on your face?'
 
So that's my look! Mascara and brows, the same as always and no lashes today as I wore this look out! I'm not great with actually wearing lashes, I usually just wear them for pictures! haha
 
I hope you like it! I will try and get some more looks done soon I promise! I just need to get a new lamp...
x

Sabtu, 21 Desember 2013

I have a Facebook Page!

Hey guys!
 
I've just made myself a Facebook Page! Wohoo!
I've wanted to make one for ages! It's a great way to really talk to people with the same interests and to share things quickly, so please please please go and 'like' my page!
https://www.facebook.com/#!/pages/Enchanted-Makeup/182471408617562?fref=ts
 
When I hit 100 followers I'll do another giveaway too!
 
Would be lovely to talk to you guys!
x

Winter Rain Makeup Look!

Hey Guys!
Sorry I haven't posted in a few days, I've been on bed rest, Doctor's orders! But I'm feeling better now and love love love playing with makeup at the moment! So here's another look!
I wanted to do a seasonal look, and seeming the weather SUCKS at the moment, a cold and blue look came to mind! I hope you guys like it :)
I started this look with, as always, my ELF primer and NYX jumbo eye pencil in Milk.
Then added Urban Decay Hijacked and Mac's Steamy to my lid.
Then in my crease I used a sky blue from my P88 Palette and Plumage by Mac.
My eyeliner is Urban Decay Liquid Liner in Perversion, Stingray by Stila on my waterline, and my lashes are the Princess Eyelashes from Born Pretty in M-3.
On my inner corner and highlighter I used Mac's Blanc Type, and also on my inner corner I added Aura by Urban Decay (the blue half, obviously!) and oh my god its just so pretty!!! It looks so gorgeous in real life but it just doesn't seem to want to photograph well!
 
Anyway that's the look for today! I wore it out today and it looked amazing!
I love it!
Note to self though: add shimmery colours LAST. Otherwise everything turns shimmery -_-
 
Hope you like it!
x

Selasa, 17 Desember 2013

Vice 2 Palette Look #1!

Hello!
The lovely Miss Louise from Lilting Grace asked me to do some looks using my Vice 2 Palette, so of course I will! I've had this one ready for a little while now, what a perfect time to use it! I will try and get some more looks out using my Vice 2 Palette asap!
If anyone ever wants to see a look, using something I've got then just let me know and I'll be more than happy to oblige!
I didn't have great lighting so sorry for the bad photos, I will do some more looks soon!
For this look I used X-Rated, Voodoo, Habit, Coax and Betrayal.
I also used Psychedelic Sister from my Book of Shadows II.
This is under different lighting, so you can see the beautiful pink colours!
Lashes are Eylure 100, mascara is Mac's Plush Lash and Benefit They're Real.
 
Hope you like the look Louise!
PS, I tried to comment on your blog but because you use Disqus it won't let me - it's always had a problem with Disqus! Never lets me comment on anyones!
x

Lush Oxford Street! Haul and Make-up Review

Hey guys! Yesterday I got to go to the brand new Lush store on Oxford Street! It was absolutely amazing! They opened the doors a day early f...